It has been a little over seven months since my last blog post about our plans. A LOT has happened since then, even a ton more than what my typed timeline said.
Most things happened as according to plan, but it took us three days to reach Enterprise AL as opposed to two days. There were tons of issues with my husband's bank account that was still in Minnesota, so cash was tied up and it left us with some major figuring out to do.
We only stayed at my dad's place for around a month and a half before we decided it'd be best for us to just go ahead and find our own place. We found awesome landlords that are SO easy to work with. We have a great three bedroom, two and a half bathroom townhouse in a pretty great location.
Audrey switched schools from where she started here in town and it is easily one of the best decisions we have made while here. She is THRIVING at that school. We love it!
Claire is doing so well in preschool, she loooooves the socialization of it all. And one of the best perks is that her preschool teacher is from Minnesota. She wears this cute little metal state-shaped necklace of Minnesota with a heart punched out by the Twin Cities (where she is from), it was just meant to be!
I've actually been through three different jobs since moving here and it is all quite depressing. Christian is having no luck finding jobs in town. He's found one that is a little over an hour north of here and it pays really well. But, with him driving the van to and from work every day, that leaves me here with no vehicle to take Claire to and from preschool. So we are still on the fence about this job...but we're looking at him at least taking an interview and we'll see where things lead. Fingers crossed!
Speaking of our van...that's new. Our old crappy Impala finally bit the dust back in October (of course, right after I had quit the crappiest and most soul-crushing job I have EVER had) and we had to search the lands high and low for a new vehicle. We actually ended up at a dealership and we signed our lives away on a van. Another pretty great decision, no matter how daunting it seems. The payments are under $200/mo and it's a 2010 Dodge Caravan. It's a rocket ship. I'm in love with it!!
The biggest perk of moving back here is the fact that I've had to have contact with Audrey's biological father. After all the excitement of those conversations, it turns out that he has been paying very little towards her child support since 2011...but it has really added up. So we received that money and it helped us get caught up on bills at the time annnnnnnd I took Audrey in to get braces for her teeth! It is single-handedly one of the best investments I have ever made. I am so excited and happy for her.
I also had a really great friend of mine, that I've known for-basically-ever present me with and help me take advantage of a really great opportunity. I'm still working on that and I don't plan to ever stop!
So this leads me to not a dumb decision, but not a smart decision. We threw our hands up in frustraion and spent what money we had left on gas/hotel/food/etc. and took a road trip up to Minnesota to surprise my husband's family at their Christmas party. It was THE greatest feeling to have his parents and siblings come in, one by one, and see their faces light up when it registered that we were really there. I will NEVER forget those moments. We stayed at four different sibling's houses before winding up at Mom and Dad's for four nights. We also surprised my best friend and then another former co-worker that I am close with. Ended up having lunch with these two ladies and spent the afternoon with my best friend. We had a great time! We did some crafting and I plan to link back to her blog, as soon as she unveils it! I stopped by and saw a really good friend of mine but wasn't able to make it back to hang out with her due to having a dinner at my in-law's with some of the siblings coming over. Despite Claire being sick on the way up and a few times at different houses, and Audrey being sick on the way back, it was a fabulous trip. We left Christmas morning (the girls didn't even know until that morning when they opened a present telling them) and then we didn't even up getting back to Enterprise until Monday night, January 5th. It was a busy 12 days!!
Now, we're back in the townhouse and we are steadily looking for jobs. Like I mentioned before, Chris is looking at taking an interview with the place that is an hour away. So, fingers crossed. I totally do NOT want to go back to Wal-Mart, but that seems to be how things may have to go for a while. Being behind on bills is not how I want things, but that is how life goes sometimes. It'll all work out in due time.
I have seen quite a few friends from growing up. I was (last minute) in the wedding for my best childhood friend, was there for her when she called to spill the beans about her pregnancy (cried. like. a. baby.), and cannot wait to love on that baby! We've attended birthday parties for kids of my greatest friends, we've had Claire's first birthday party away from Minnesota, we spent Thanksgiving and Christmas Eve with my dad. I have been out to lunch and church and painting parties with a handful of really awesome ladies, made some great new friends from that circle. My best customer is still ordering hand-painted canvases from me, she is SUCH a blessing! My best friend from Charlotte sent us Christmas for the girls and just made their holiday extraordinary, another huge blessing. She's also pregnant and I am seriously excited to go visit her and her sweet family in a few months. And I made a new best friend from the last job I had. Her and her husband have been perfect additions to our life here in Enterprise. They are super aware of themselves and how to include my deaf husband in all of our shenanigans. We love them very dearly.
I have court coming up this Monday with Audrey's biological father; that'll be interesting. The next day is her first appointment since getting her braces put on, and then the following week is my birthday. Audrey will turn NINE February 7th, Valentine's Day will happen, and then my old man will really be an old man on February 28th. And then life will carry on, as usual.
It is crazy how much can be jam-packed into life. Some days I can really remember and enjoy why I am here. Then, other days, I can't see past the seconds that are wasting away. Getting through the hard times only lead to more hard times. But the memories we are making between all of that are worth it.
-Erin
Thursday, January 8, 2015
Monday, May 26, 2014
Update!
I figured I should do an update quick, complete with a link back to a previous post. Redundant, a bit.
First:
We have had quite a whirlwind of activities here. It panned/pans out like this:
- 05/08/14-Christian had these huge-super-important-fail-and-don't-graduate-with-the-huge-super-important-certificate-needed-for-the-degree tests. He passed them both with flying colors. Not gonna lie, we were super stressed about this one.
- 05/11/14- Mother's Day. I was actually scheduled the day off from work, I teased saying that it was my manager's going away gift, lol. Didn't have a nice, quiet day. But we tried. :]
- 05/13/14- This day is a mixture of things. First and foremost, it was my fourth wedding anniversary with my wonderful husband. We always go to Target Field for a Twins game. I sat next to this older gentleman who was from South Dakota and was a Red Sox fan. He was hilarious and shared some of his story with me. I love human interaction like that. We won against the Red Sox that night.
- Before the game, we met up with Charlie's (our black lab that we couldn't take with us to Alabama) new owner. She was really nice. Loading Charlie in his kennel in the back of their SUV was pretty damn hard. He was all excited; playing with the new toy his new owner brought for him. We watched them close the back hatch on the SUV, get in, and drive away. One look at Christian and I lost it. I can't believe how hard that was. We have gotten pictures and updates- Charlie is doing great with his new home and new friend, three year old yellow lab Chloe. But I miss him.
- 05/14/14- Christian had finals! All A's, baby!
- 05/15/14- Christian graduated college, for the second time. I cried. Duh, I cry. All. The. Time.
- 05/16/14- My father-in-law was treated to dinner and a Twins game with Christian for a late-Christmas/early-birthday present. We won that night, too.
- 05/17/14- My bestest friends from work treated me to a night out for a going away party. I picked 80's Nite at the roller rink up in St. Cloud. It was a BLAST! I will miss those ladiess dearly.
- 05/18/14- I hosted a birthday party for the same baby whose baby shower I hosted. This day was also busy with meeting up with the lady who bought our second car from us. The 18th was also my FIL's birthday, so we went over and spent the evening with most of the family for that. Great time.
- 05/21/14- MY LAST DAY OF WORK! Until July 7th, anyways. 07/07/14 is my first day of work as a transfer into the store in Enterprise AL.
- 05/24/14- Memorial Day Weekend BBQ at my SIL's in Hutchinson. Not many folks came out, but it was nice because no one really had to compete for attention. :]
- 05/25/14- Memorial Day Weekend BBQ at my SIL's in Arlington. It was so nice to be at Emily and Todd's. It's so relaxed and chill, I was conpletely not concerned about my kids acting like fools, they were too busy!
Ok, so now that we're up-to-date...I have to give you a quick run down of the days leading up to our move.
- 05/26/14- Christian will leave in the afternoon to go with his dad up north to the cabin for fishing. They'll be gone for at least three days. I'm leaning towards five or so days. I have a lot planned for while he's gone. We'll see how much of that actually happens.
- 05/31/14- We'll go out to birthday dinner for my husband's birthday. His birthday was back in February, but my MIL & FIL have eight kids to take to dinner! We picked Texas Roadhouse up in St. Cloud. Totally stoked!
- 06/01/14- We'll all head out to Inver Grove Heights to visit with one of the ASL interpreters Christian grew up with. She's who was there for our wedding; she's basically family. We love her so much and don't see her often, so this day will be nice.
- 06/02/14- This day will be spent loading up all the trash from the house/garage/backyard to take to the landfill. This is a BIG step in getting packed and ready for the move.
- 06/04/14- Audrey's 2nd grade field trip to the zoo. I'll ride in the bus and chaperone, Christian and Claire will meet us there.
- 06/05/14- Audrey's last day of 2nd grade! She's so excited, but then again she isn't. This will probably be the last time she sees most of her school friends.
- 06/07/14- Christian will leave to go up north with his parents for his maternal uncle's wedding reception. The kids and I will stay home- pack, pack, pack.
- 06/11/14- We will drive out to see my other SIL that lives in Arlington to celebrate her twins' birthday.
- 06/16/14- Christian and I will drive out to Chaska to pick up our 22' Penske moving truck. We'll spend all day packing the truck up and having family and friends over to help out/spend time with.
- 06/17/14- We'll wake up, pack up the leftover, smaller items and HEAD OUT. We're hoping to leave Glencoe MN, headed out of the state, ABSOLUTELY no later than 9am. And even that is super late.
- We will arrive in Enterprise AL no later than 06/19/14. We may stop in Nashville for a bit longer than normal, due to some friends that live there. We'll see where the wind takes us. :]
That seems soooo long when typing it out. Oh my goodness. I'm so sorry if you read all of that. But thanks, if ya did! We are so excited for our plans. I can't believe we have 22 days left. That's it.
Next post: FINALLY posting the finished canvases for my friend from high school.Ya know, only two months later!
-Erin
Thursday, April 10, 2014
Weight Loss!

Since eating a skinny person is not socially acceptable, I figured I'd give this diet/cleanse thing a try that a couple of my sister-in-laws and mother-in-law had some success with. Because I have NO luck with diets, we're just calling this a cleanse...which is really what it is.
Sister One lost 10lbs, Sister Two lost 11.7lbs, and Mother lost 6lbs. IN ONE WEEK.
So, I look at it this way: I've got roughly nine and a half weeks before we move to Alabama. During this cleanse, you have to take a break for three days before you can repeat the process. So that gives me, again, roughly two weeks of "break time" between each week of cleanse. So if I stay the course and follow the cleanse and drink the approved water and club soda, I could potentially lose 70lbs.
Now, I'm not in some fantasy land with the assumption that I WILL lose 70lbs because this cleanse is fool-proof. Because it isn't fool-proof. I slip up, a lot. I have no resolve and constantly give into cravings. The one plus side to this cleanse is that my husband and I are going to suffer through it together. And we've got three wonderful women that have tried, and had success at, with this cleanse. Support systems are a most important part of any diet or cleanse!
In a semi-related topic, we were cleaning out our computer desk and going through things that we can go ahead and pack away. I found a list that I wrote back on June 28, 2012 as to why I wanted to lose weight. These all still apply and I can't believe it's been almost two years since I've written these things down and I have YET TO DO ANYTHING ABOUT IT.
Well, that's about to change. Starting tomorrow, we are free.
WHY I WANT TO LOSE WEIGHT
1. So I can be around for my kids and husband.
2. For my general health and well-being.
3. To feel confident in and about myself.
4. So that my shoes live a longer life!
5. To prove others wrong.
6. So that I can buy all those really cute outfits that I pin on Pinterest.
7. So that my knee pains will lessen.
8. So that my body will become stronger and more dependable.
9. For bragging rights. :)
10. To run or bike without becoming winded after one minute in.
11. So that I can dance and actually look decent.
12. So that I don't get sweat rashes.
13. To be a great role model for my kids and others (mostly my kids).
14. To help me smile more.
15. To help demolish negative thoughts.
16. To have pretty knees.
17. To test myself.
18. So that I can confidently participate in a marathon.
19. To avoid surgery of any sort.
20. So that I'm not embarrassed to hop in a kayak or go to the lake.
21. To make my family proud.
22. So hopefully my legs won't rub together as much.
23. To help focus myself on the positive while still being realistic.
24. To love myself!
25. So that I can run around with the dogs.
26. To catch paper blowing away on a windy day.
27. So that my car doesn't drop down so much when I climb into it.
28. So that ache and blemishes clear up.
Mental health is most important when starting a diet. I'm not in a great spot right now, but I'm better than I used to be. I am determined to shed some weight before we are seriously packing up and moving to Alabama. Not only will weight loss help with being able to quickly and efficiently run around, packing the moving truck, it will also help me to feel more confident and more comfortable when I see my family for the first time in years. When I see friends from high school or run into old boyfriends. Those are the things that help motivate me.
So, if you see me slipping or read about something on Facebook, don't be afraid to message me or post on my wall to help encourage me and remind me of the reasons I am doing this in the first place!
Thanks!
-Erin
Tuesday, March 25, 2014
Homemade Rock Candy!
So my wonderful hubby ordered a ton of flavoring oils from online and we got our shipment in yesterday. It was like Christmas...except I knew what was in the box. And the box wasn't wrapped pretty. And I had to pay for it. But it was like Christmas!
So now we've got a ton of flavors to choose from and we even purchased a tart and sour flavoring additive, so that'll be interesting! We also ordered some molds to use for the rock candy. The molds are also usable with chocolate...so who knows how that's going to go. ;]
I'm still not quite ready to post a tutorial on the rock candy, we've not really perfected the process yet. Once I can do this with my eyes closed, I'll be able to teach y'all!
If you'll follow the link that will be provided at the end of the post, it'll take you to a listing of the flavors and prices. The link after that will be a link to my Facebook page for this lovely blog; like us!
Another blog entry should be coming soon with some more updates on how things are going! Stay tuned. :D

Homemade Rock Candy Information
A Hankering For on FB
Thanks!
-Erin
So now we've got a ton of flavors to choose from and we even purchased a tart and sour flavoring additive, so that'll be interesting! We also ordered some molds to use for the rock candy. The molds are also usable with chocolate...so who knows how that's going to go. ;]
I'm still not quite ready to post a tutorial on the rock candy, we've not really perfected the process yet. Once I can do this with my eyes closed, I'll be able to teach y'all!
If you'll follow the link that will be provided at the end of the post, it'll take you to a listing of the flavors and prices. The link after that will be a link to my Facebook page for this lovely blog; like us!
Another blog entry should be coming soon with some more updates on how things are going! Stay tuned. :D
Pint 916 oz) jar of Root Beer flavored
homemade rock candy.
Homemade Rock Candy Information
A Hankering For on FB
Thanks!
-Erin
Friday, February 21, 2014
Canvases!
We're snowed in today! Minnesota had about 12+ inches dumped on it all day yesterday, overnight and this morning. Between the snowfall, the winds, and snow drifts, we're well past knee-deep in snow! My husband made it to the next town over for his college class this morning, but heading home was a different story. So, needless to say, I'm staying home from work this evening. So! You guys get a blog post! Yay!
A good friend of mine that I graduated high school with had chatted with me on FB about ordering some canvases she'd like made up for her living room. She sent me some screen shots of pictures she'd seen. We further chatted about coloring and sizes and she was just pretty much like, "Ok, sure. Whatever all that means, just do it!" Lol. I get so caught up and wanting to make sure I capture exactly what the individual wants that I smother them with questions. So, I apologize in advance if this happens to you!
She specifically ordered a canvas to say "You be the anchor that keeps my feet on the ground, I'll be the wings that keep your heart in the clouds" in the shape of an anchor. She showed me a picture of one she found online and I ran with it. I googled the quote more and decided to stick with the similar color scheme.
(via my wonderful Instagram photo-taking skills)
It isn't perfectly symmetrical. There are a ton of imperfections I see.
But the individual loves it. And it's getting a lot of positive feedback
from friends and family on FB. So I -MUST- be doing something right!
I just have to remind myself of that!
Sneak Peek of another piece for this individual:
(via my wonderful Instagram photo-taking skills)
Notice my totally awesome drying area (a box with a tote lid on it).
Do what I gotta do!
She also ordered a canvas trio with a cross, anchor, and a heart with
corresponding scriptures. I've got a few more layers of paint for the
words to go, but I think it's turning out pretty great! Sat down this morning
and just focused on getting them painted and the words on.
I have one more project to go for her (for this order) and then I can
ship them off! She's almost jumping out of her skin with pure
excitement to get her hands on these and put them up at home!
Love the love she has for this!
Check back in a couple of days for an update on this order! I can't wait to share all this with you!
-Erin
Thursday, February 20, 2014
An Etsy Shop Of My Very Own!
I've done it! I've finally done it!
I opened my Etsy shop this morning!
There isn't much there and there isn't a great deal of beautiful graphics to show off some kind of great skill at decorating my page...but I'll get there!
Thanks to everyone for supporting me and helping me realize that this IS something I not only want, but need.
God Bless!
-Erin
Sunday, February 16, 2014
My Little Pony 8th Birthday Party!
So, my oldest daughter turned EIGHT years old on February 7th. I just cannot believe that it has been that long. I know, I know. Eight years is nothing, wait until she's 16, or in college, or a mother to her own child(ren). I know. But, holy cow.
Audrey debated for a few weeks but we finally decided on having a My Little Pony (MLP)-themed party for her birthday this year. I didn't really watch any of the shows or whatnot before and I haven't really watched any of the new ones. So getting into this theme was a little more difficult than other parties I have put together.
So with the help of Audrey, Google, and Pinterest, this is how her party went (and yes, I know that some of the things are "wrong" or "don't fit", but I made them work for my needs!):
Cute banner that Audrey ADORED from Oriental Trading.
Great quality, currently STILL hanging in our living room.
A peek of the streamers I put up last minute along with the tissue paper
fringe that I made via a tutorial from Kelly at one of my favorite DIY pages,
Studio DIY. That tissue paper fringe is also still currently up in our living
room. My super-creative MIL asked if the fringe was to resemble the
tails of the ponies! How I wish I could have taken credit for that thought!!
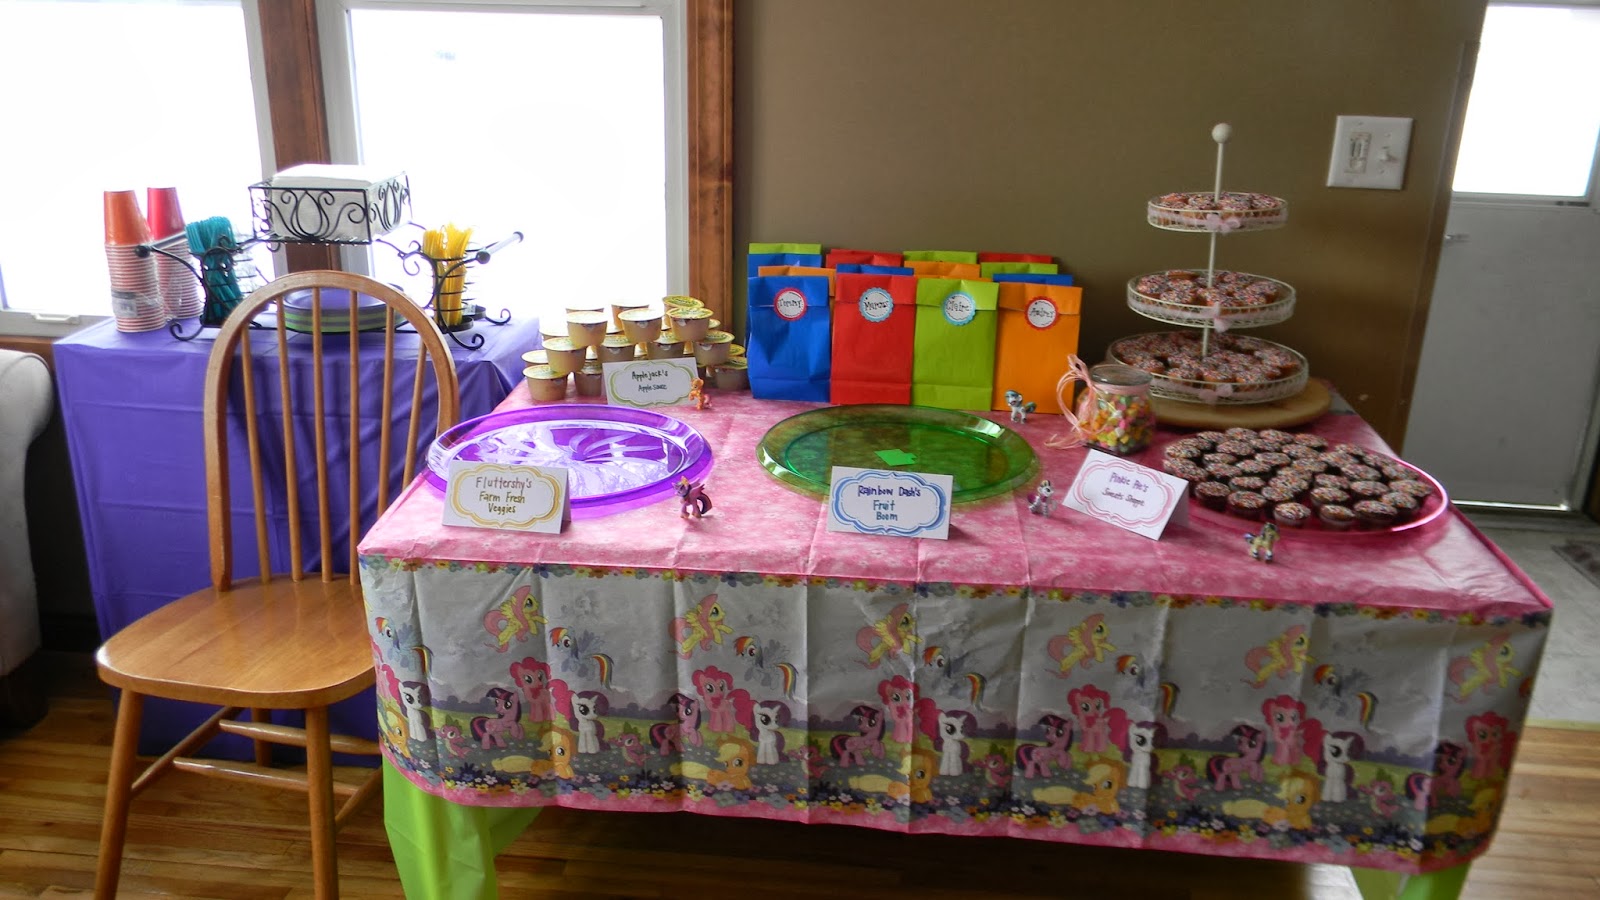
The food spread, minus the food just yet.
Tablecloth is from Wal Mart (the ONLY decent one I found!), the
platters (purple, green, and pink), the treat bags, and most items
in the bags, are from Party City. My cupcake stand came from
World Market from a few years ago. I actually use that in my office for
ribbons and other odds and ends. The caddy with napkins, utensils,
and plates came from Sam's Club (and everyone adores it!).
Pinky Pie's Sweet Shoppe.
Strawberry mini cupcakes with vanilla frosting and
chocolate mini cupcakes with chocolate frosting with
both flavors bathed in rainbow nonpareils.
Applejack's Applesauce.
Just a little bit of rainbow candy.
These streamers were quite fun for a lot of the smaller kids. I should
have just put a whole line of it down in the playroom for them all to
just tucker out playing with it.
Another photo of my glorious fringe. I absolutely
adore it!
Not great lighting, but this is a rainbow paper latern banner
I picked up from Party City. Bought it to add color to the other
side of the room from the MLP banner.
Alright! Brought out the veggies and fruit, so here's that!
Fluttershy's Farm Fresh Veggies
(One of the things I tweaked to work for me.)
Green peppers, cauliflower, cherry tomatoes, celery, and
baby carrots. Sour cream/ranch mix dip. Biiiig hit with our
family!
Rainbow Dash's Fruit Boom.
(This was orginially going to be skewers, but we compromised!)
Strawberries, canteloupe. pineapple, kiwi, and grapes. Also a
huge hit with the family. We couldn't keep the fruits and veggies stocked
up enough to keep up with everyone grubbin' on it!
Candy/present table.
The birthday girl!
Everyone had a great time and the kids really enjoyed their treat bags. We also handed out the left over treat bags from Claire's fourth birthday party of Jake and the Neverland Pirates! So the boys really enjoyed that, too. Audrey received some pretty great gifts and is currently enjoying every single one of them.
Thanks for reading!
-Erin
Subscribe to:
Posts (Atom)